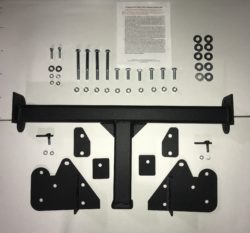
2002-2006 Sprinter Van Front Tow Hitch Installation Instructions Download
Enhance your vehicle with this specialized carry hitch, perfect for mounting bicycle racks or carry platforms. Designed exclusively for carry weight (maximum 300 pounds), it is not suitable for towing, pulling, or winching. Ensure that the hitch installation does not obstruct headlights, turn lamps, hinder the driver's road view, or restrict airflow to the radiator and engine.
Installation Steps:
Lifting the Vehicle: Use 2 jacks under the arm area and 6-ton rated jack stands on the transmission crossmember. Removing tires and front bumper/fascia improves ease of installation.
Removing Front Components: Take off the front grill, headlamp trim, and fascia. Disconnect the ambient air temperature sensor and fog lamps, if present.
Frame Preparation: Scrape undercoating off both sides of the frame rail. Use the hitch frame brackets as a template for drilling 1/2” holes in the frame rails. For Cab Chassis models, remove the vacuum accumulator temporarily.
Bracket Installation: Ensure brackets are flush against the frame rail and install the mounting bolts, backing plates, flat washers, and Nyloc nuts to a loose/snug fit.
Drilling and Bolt Installation: Drill a 7/16” hole in the bottom of the frame rail. Use the fish wire technique to install the Carriage bolt through the frame rail hole and the hitch frame bracket.
Assembling the Hitch Receiver: Place the hitch receiver assembly between the frame rail brackets. Tighten all bolts to the specified torque (1/2” bolts to 75 pounds, Carriage bolts to 50 pounds).
Final Steps: Cut a section from the fascia to fit the hitch receiver. Reinstall all components removed earlier. After initial use, re-torque all nuts to specifications.
For detailed figures and additional guidance, refer to the provided installation manual. This comprehensive guide ensures a safe and correct installation process for your carry hitch.
